Sunday, April 6, 2014

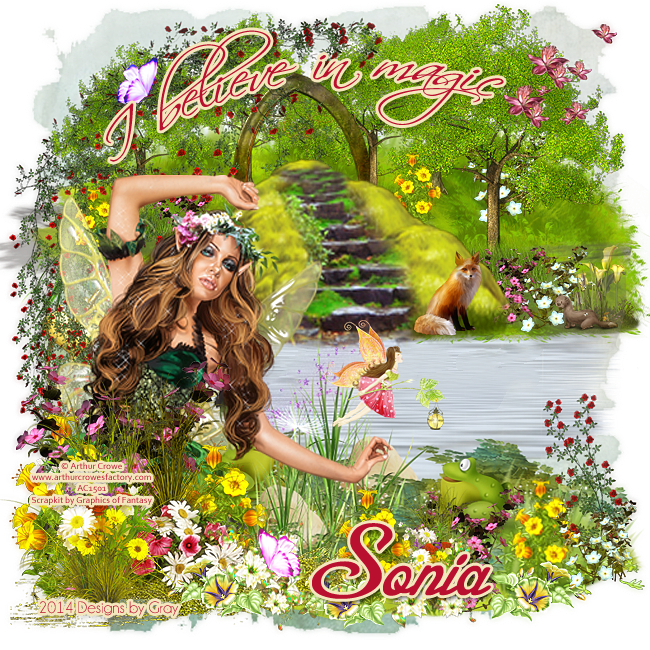
CT Tag and SNAGS PTU The Secret of Elf Wood kit by Graphics of Fantasy

New CT tags using the PTU kit The Secret of Elf Wood by Graphics of Fantasy kits.
I paired these with Arthur Crowe's Forest Fairy HERE
and Misticheskaya's Brianna HERE.
You must have a valid license in order to use these artworks.


*click image to view full size*


*click image to view full size*

Here's a preview of the kit:

You can buy this kit from PFD HERE,
Scraps From the Heart HERE,
and the Graphics of Fantasy store HERE.

And, as promised, here are some snags for you!
I hope you can find a use for these.
Please do not alter my work in ANY WAY.
Thank you!

*click image to view full size,
then right click to save as*


If you like my work, please leave me a comment,
and as always, thanks for stopping by!


CT Tag and SNAGS PTU The Easter House by Graphics of Fantasy

New CT tags using PTU The Easter House by Graphics of Fantasy kits
I paired these with one of the girls of Zlata_Ma's Beautiful Liras HERE
and Arthur Crowe's Flora Fairy HERE
You must have a valid license to use these artworks.


*click image to view full size*


*click image to view full size*

Here's a preview of the kit:

You can buy the kit from PFD HERE,
Scraps From the Heart HERE
and the Graphics of Fantasy store HERE

And here are some snags for you!
I hope you can find a use for these tags, but
please don't alter my work in ANY WAY.

*click to open in full size, then
right click to save as*


If you like my work, please leave me a comment,
and as always, thanks for stopping by!


Monday, March 31, 2014

TUTORIAL for PTU Tender Touch of Pink kit by P-O Concept and SNAGS


*click image to view full size*


This tutorial was written by me on March 29, 2014.
Both the tag and the tutorial are purely my own work, 
and any similarities to anyone else's creations are purely coincidental.

I use Photoshop Elements 5, which is NOT the most updated version, so you may have a quicker way to do things.  I don't have any fancy plug-ins or flashy extras.  My way of making this tag is certainly NOT the only way, nor is it the best.  I only offer ONE way to create a tag.

Some knowledge of Photoshop (any version) is assumed and required for understanding this tutorial.

Here we go!

Tube: Pink Life by Arthur Crowe HERE
Scrapkit:  Tender Touch of Pink by P.O. Concept HERE
Mask:  108 by Designs by Vaybs HERE
Font: AR Decode

File - New - 650 x 650 / 200 ppi - Rename - Layer 0 - Hide

Open Mask 108 - use Magic Wand to select black background -
Edit - Cut - Set opacity to 50 - resize by about 25%

Open element 38 - c/p as new layer - reposition slightly to down and to the right
Duplicate layer - reposition to top left corner - resize by about half

Open element 98 - c/p as new layer - resize to fit canvas from top to bottom -
rotate 90° - reposition to the top of the canvas

Open element 60 - c/p as new layer - resize bigger by about 25% -
reposition to bottom center of canvas

Open tube (Pink Life) - c/p as new layer - reposition to bottom center (to appear as if tube is laying on pillow) - resize to fit

Hide all layers except tube layer - in Special Effects window, add Drop Shadow -
Layer - Layer Style - Style Settings -
Change the opacity slider to 100

Un-hide all other layers
(Should be a shadow under tube layer)

Open element 94 - c/p as new layer - resize by about half -
reposition layer behind tube and cushion

Open element 51 - c/p as new layer - resize by about 75%-
reposition layer between tube and cushion-
reposition to the bottom and slightly to the right

Open element 15 - c/p as new layer - resize by about 50% -
reposition layer between tube and cushion -
reposition to the bottom and slightly to the left

Open element 14 - c/p as new layer - resize by about 75% -
reposition to the right and slightly down - rotate by about 20°

Open element 27 - c/p as new layer - resize by about half -
Layer - Rotate - Flip Layer Horizontal -
reposition to the bottom and slightly to the left - rotate slightly to the right

Open element 106 - c/p as new layer - resize by about 25% -
reposition to the bottom center - rotate about 90°

Open element 7 - c/p as new layer - resize by about 80% -
Image - Rotate - Flip Layer Horizontal -
reposition layer behind bouquet layer
reposition to the bottom center (hidden partially behind previous layer)

Open element 2 - c/p as new layer - resize by about 75% -
reposition to the bottom center and slightly to the right
reposition layer behind previous layer

Open element 27 - c/p as new layer - resize by about 25% -
reposition to the bottom and slightly to the right -
reposition layer behind tube and glass layers

Open element 61 - c/p as new layer - resize by about half -
reposition to the lower right side and slightly above previous layer-
reposition layer beneath previous layer

Open element 40 - c/p as new layer - resize by about half -
reposition to lower right side and slightly above previous layer -
reposition layer beneath previous layer

Open element 45 - c/p as new layer - resize by about 25% -
rotate about 30° to the right - reposition to lower left -
reposition layer beneath all flower layers-
Duplicate layer - resize by another 25% -
rotate about 60° to the left -
reposition to the lower right, beneath flowers

Open element 8 - c/p as new layer - move up and to the right slightly -
reposition layer to under tiger layer
Duplicate layer -
Image - Rotate - Flip Layer Horizontal -
Rotate slightly to left - move slightly to the left

Open element 3 - c/p as new layer - resize by about 50% -
move to top left corner - rotate slightly to the right

Open element 4 - c/p as new layer - resize by about 50% -
move to upper right side

Open element 5 - c/p as new layer - resize by about 50% -
move to lower left side

Hide layer 0, mask, fireworks, and frame - Merge visible
Duplicate layer
Filter - Blur - Gaussian Blur 3.0 - Okay
Change blend mode to screen - Change opacity to 50
Merge down
Enhance - Auto Sharpen
Special Effects - Photo Effects -
Drop Shadow
Crop frame back down to original size (I use layer 0 as a template for the right size)

Delete Layer 0

New text layer - color #fe01a2 - size 30 - type name - reposition to bottom right -
rotate to the left slightly
In Artwork and Effects window, go to Text tab
Outline - Apply

Add credits - Save

~*~*~*~*~*~

And here are some tags for you guys.
Please do not alter these images in ANY WAY,
or claim my work as your own.

*click to open image in full size,
then right click to Save As*


If you like my work, please leave me a comment.
And as always, thanks for stopping in!


Saturday, March 29, 2014

My Imagination Facebook Set

Facebook set using Nice Day by Alex_Prihodko HERE
You must have a valid license to use this art work.

Kit by Dees'Sign Depot - My Imagination HERE
Here is a preview of the kit:


Here's the Facebook set I made.
Please do not steal or alter these in ANY WAY.
Please do not claim my work as your own.

*click to view full size*


Please leave me a comment if you like my work,
and thanks for stopping in!


Tutorial for PTU Garden Bouquet kit by P.O. Concept


*click image to view full size*

This tutorial was written by me on March 29, 2014.
Both the tag and the tutorial are purely my own work, 
and any similarities to anyone else's creations are purely coincidental.

I use Photoshop Elements 5, which is NOT the most updated version, so you may have a quicker way to do things.  I don't have any fancy plug-ins or flashy extras.  My way of making this tag is certainly NOT the only way, nor is it the best.  I only offer ONE way to create a tag.

Some knowledge of Photoshop (any version) is assumed and required for understanding this tutorial.

Let's get started!

Tube:  Rowanberry by Alex_Prihodko HERE
Scrapkit:  Garden Bouquet by P.O. Concept HERE
Font:  Impact

File - New - 650 x 650 / 200 ppi - Rename - Layer 0 - Hide

Open element 127 - c/p as new layer - resize to fit canvas

Open element 19 - c/p as new layer -place in center

Open tube (Rowanberry) - c/p as new layer - resize by about half - place in center

Open element 105 - c/p as new layer - resize by about half - move layer BEHIND tube layer - place to lower left of tube
Enhance - Adjust Color - Color Variation - Increase Red x2 - Increase Blue x2 - Okay

Open element 81 - c/p as new layer - resize to about 60% - place to the lower right of tube

Open element 126 - c/p as new layer - resize to about 75% - rotate about 80° -
place to the lower right of the tube
Duplicate layer
Image - Rotate - Flip Layer Horizontal
Reposition to the lower left of the tube

Open element 101 - c/p as new layer - resize to about 50% - place below and slightly to the left of  tube
Duplicate layer
Image - Rotate - Flip Layer Horizontal
Reposition slightly to the right

Open element 32 - c/p as new layer - resize to about 60% - place to the right
Duplicate layer
Image - Rotate - Flip Layer Horizontal
Reposition slightly to the right

Open element 104 - c/p as new layer - resize to about 50% - place to the right

Delete Layer 0 - Merge visible
Duplicate layer
Filter - Blur - Gaussian Blur 3.0 - Okay
Change blend mode to screen - Change opacity to 50
Merge down
Enhance - Auto Sharpen

New text layer - color #63125d - size 36 - type name - reposition in bottom center
In Artwork and Effects window, go to Text tab
Outline - Apply
Layer - Layer Style - Style Settings
Stroke - Size 5 - OK

Add credits - Save


CT Tag PTU Simply Elegant by Graphics of Fantasy

New CT tags using PTU Simply Elegant by Graphics of Fantasy kits.
I paired these with Kamilla by Zlata_Ma HERE
and Helen by Misticheskaya HERE.
You must have a valid license in order to use these artworks.


*Click image to view full size*


*Click image to view full size*

Here's a preview of the kit:

You can buy the kit from PFD HERE,
Scraps N Company HERE,
and from the Graphics of Fantasy store HERE.

If you like my work, please leave me a comment,
and as always, thanks for stopping by!


CT Tag PTU Dragon's World by Graphics of Fantasy

New CT tags using PTU Dragon's World by Graphics of Fantasy kits.
I paired these with 3 Pretty Girls by Zlata_Ma HERE
and Tina/Maleficent by Celinart HERE.
You must have valid licenses in order to use these artworks.


*click image to view full size*


*click image to view full size*

Here's a preview of the kit:

You can buy the kit from PFD HERE
Scraps N Company HERE
and the Graphics of Fantasy store HERE

If you like my work, please leave me a comment, 
and as always, thanks for stopping by!


Friday, March 28, 2014

Dress White SNAGS

Tag snaggables using Zlata by Zlata_M HERE
You must have a valid license to use this artwork

(Can you tell I REALLY like this tube?  ^_^)

Kit by Peony - Dress White HERE

Here's a preview of the kit:

And here are the snaggables.
Please do not alter these images in ANY WAY.
(Click to see full view, then right click and Save As.)
Enjoy!


If you like my work, please leave me a comment,
and as always, thanks for stopping in!


Friday, March 21, 2014

Show Me and Sad Lil Goth SNAGS

Tag Snaggables using Zlata by Zlata_M  HERE
You must have a valid license to use this artwork

Kit by Amy Marie - Show Me  HERE
Here's a preview of the kit:


Here are some snaggables for you guys. I hope you can find a use for them.
Please do not alter these images in ANY WAY.
(Click to see full view, then right click to Save As."


And MORE tag snaggables, using Aivelin by Aiveling  HERE
You must have a valid license in order to use this artwork.

Kit by Amy Marie - Sad Lil Goth  HERE
Here's a preview of the kit:

And here are the few snaggables.
I hope you can find a use for these.
Please do not alter these images in ANY WAY.
(Click to view full size, then right click to Save As.)


If you like my work, please leave me a comment.
And as always, thanks for stopping in!  <3